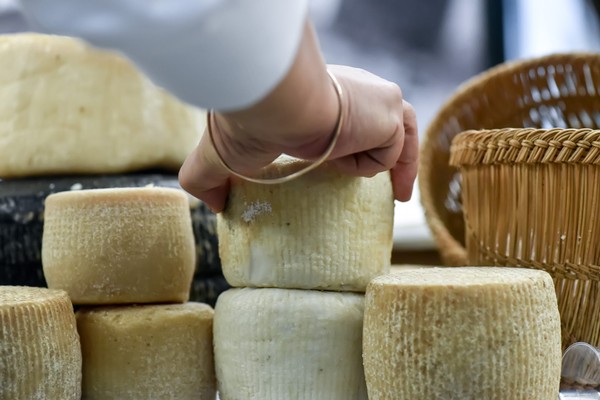
Guido's Hard Italian Cheese

This little Italian hard cheese is based on a Parmesan-style recipe formulated by the cheesemaker it’s named after, Guido Guintini.
Marthinus StrydomThe Story
This little Italian hard cheese is based on a Parmesan-style recipe formulated by the cheesemaker it’s named after, Guido Guintini. It’s a great hard cheese to start with because it uses simple ingredients and minimal equipment and only needs to age for 3 weeks (but can go longer if you want it to turn out more like a Parm).
More about Italy
Italy is one of those countries about which you probably have quite a number of preconceptions before you have put one foot into the country. A country of olive oil and mafia, pasta, wine and sunshine, roman ruins and renaissance palaces, Italy has a lot to offer its visitors. Although some of these images are appealing, it would be a shame if that was the only thing you come away with. Italy is certainly much more complex and interesting than that.

Subscripe to my Facebook page.
Subscripe to my Youtube channel.
© All recipes are copyright protected by TheCultureCook.com unless the recipe was adapated from another source. All recipes are uniquely crafted and adapted by TheCultureCook.com. Copyright of some or all of the text reside with the original author.
Ingredients
Method
- Add the milk to a non-reactive 10-litre stock pot and set it inside the water bath filled with water to the level of the milk in the stock pot.
- Mix 1⁄2 tsp calcium chloride in 1⁄4 cup distilled water. Add the calcium chloride to the milk and gently whisk it in for 1 minute.
- Heat the milk slowly to a temperature of 90 F (32 C); this should take more than 20 minutes.
- Sprinkle 1⁄4 tsp Thermophilic (Thermo B) culture over the milk and let rehydrate for 5 minutes. Mix well using a whisk in an up-and-down motion, Cover, maintaining the milk at 90 F (32 C) and let the milk ripen for 10 minutes.
- Mix the rennet in 1⁄4 cup distilled water. Add the rennet to the milk and gently whisk in for 1 minute. Cover and let sit, maintaining 90 F (32.2 C) for 15 minutes, or until the curds give a clean break.
- Cut the curds in 1/2 cm (1/4-inch) cubes. Gently stir for 1 minute and let rest for 5 minutes.
- Stirring frequently, slowly heat the curds to 120 F (49 C) over a period of 30 - 40 minutes.
- Line a cheese mold with moist cheesecloth, set into a bowl or pot, and ladle the curds into the mold (if you’d like to make a flavour variety such as cumin or espresso, add the ingredients to the curds before you fill the mold.
- Set the mold’s follower (or another basket) onto the cheese, add a can if necessary and put a 2.5kg (5 - 7.5lb) weight on top. Wait for 15 minutes.
- Take the cheese out of the mold, unwrap, turn over, re-wrap and put back into the mold with the same weight on top. Do this again for 15 minutes, then for 30 minutes, then for 1 hour, or until the rind of the cheese has closed.
- Eventually, after turning and re-wrapping, press the cheese with a 2.5 - 3.5kg (5- 7lb)weight for 12 - 24 hours.
Combine 113 g of cheese or non-iodised salt in 1 litre of water to make a brine solution. Remove the cheese from the mold and place it in the brine solution. Let set for about 12 hours (more for bigger wheels, less for smaller wheels).
Remove the cheese from the brine and pat dry with paper towels (boil the brine and strain it; then refrigerate for later use).
Ageing alternatives
-
Natural rind
Place the cheese on a cheese mat in a container in a cool place, between 10-15 C (50 F - 55 F), for 3 weeks to age.
For the first week, turn the cheese 2 - 3 times a day. After that, turn it once a day.
At the three-week mark, you can slice the cheese and enjoy. Guido recommends serving it as an after-dinner treat with a bit of honey on top and a glass of Chianti.
-
Vacuum-pack
Place the cheese on a cheese mat in a container. Cover the container and the cheese with cheesecloth to prevent insects getting at it. Let dry for 4 days using a small fan to blow air by the cheese, turning each 12 or 24 hours to dry evenly.
After 4 days, vacuum-pack the cheese and put in fridge for 3 weeks turning everyday.
After three weeks, take cheese out of the vacuum bag and set it to dry on a cheese mat in an open container as before for a couple of days, or longer, so it can develop a rind. When ready wrap in cheese paper and store in fridge.
