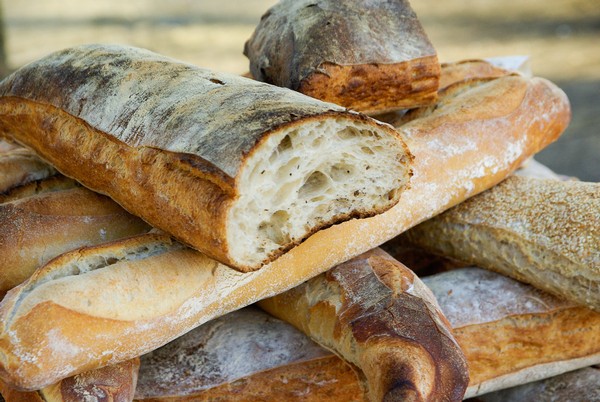
Easy Ciabatta Bread

You can make a rustic Italian loaf with this easy Ciabatta Bread recipe, which is great for dipping into sauces or soups. This bread has a lot of random holes and a nice chewy middle because of its high moisture content.
Marthinus StrydomThe Story
Ciabatta is an Italian bread that was first produced back in 1982 by Arnaldo Cavallari, a miller and baker in a small town close to Venice. At the time bakers in Italy were concerned by the popularity in the country with French baguettes and were afraid that they would endanger their business. As a way to combat this, they set out to try to create an Italian alternative that would work for sandwiches. After weeks of trying and testing breads, the ciabatta came to be and consisted of a soft, wet dough with gluten flour. The new bread was registered for trademark by Cavallari and was called ciabatta Polesano for Polseine where he lived. It was subsequently licenced to bakers in other countries. Many regions in Italy now have their own variations on the original recipe.
More about Italy
Italy is one of those countries about which you probably have quite a number of preconceptions before you have put one foot into the country. A country of olive oil and mafia, pasta, wine and sunshine, roman ruins and renaissance palaces, Italy has a lot to offer its visitors. Although some of these images are appealing, it would be a shame if that was the only thing you come away with. Italy is certainly much more complex and interesting than that.

Subscripe to my Facebook page.
Subscripe to my Youtube channel.
© All recipes are copyright protected by TheCultureCook.com unless the recipe was adapated from another source. All recipes are uniquely crafted and adapted by TheCultureCook.com. Copyright of some or all of the text reside with the original author.
Ingredients
Method
- In a medium-sized bowl combine 1 and 1/2 cups (200g) of the flour, 1 cup (240g) of the water, and yeast. Stir with a wooden spoon until the mixture is well mixed and free of lumps.
- Cover the bowl will plastic wrap and refrigerate overnight, at least 12 hours but up to 24 hours. This will add a lot of structure and flavor to the finished bread.
- Remove the sponge from the refrigerator and add the remaining 1 cup (240g) water. Gently run a rubber spatula around the outer edge to release the sponge from the bowl. The water you just added will make this easier.
- Transfer the sponge mixture to the bowl of a stand mixer fitted with the paddle attachment. Add the remaining 2 and 3/4 cups (353g) flour and the salt.
- Beat on low speed for 1 minute. Turn the speed up one notch and beat for another minute. Then turn the speed up one more notch and beat until the dough starts to release from the sides of the bowl, about 4 minutes.
- Drizzle the olive oil in a large bowl and rub it around to evenly coat the inside of the bowl. With wet hands, transfer the dough to the bowl. Cover with plastic wrap and let rise for 45 minutes.
- Using a well-greased scraper, gently fold the dough over onto itself. Cover with plastic wrap and let rise for another 45 minutes. Repeat this step once more and let the dough rise for a final 45 minutes. (The dough isn't going to rise much during this stage. Don'tpanic, this is normal for this recipe.)
- Liberally flour your work surface with flour and let the dough slide out of the bowl onto the counter. Be very gently here so you don't knock all the air out of the dough and try to handle the dough as little as possible.
- Liberally dust the top of the dough with flour. Using 2 well-floured bench scrapers, carefully manipulate the dough from the sides to form a square. Take care not to put pressure on top of the dough.
- Cut the dough in half, down the middle of the square. Gently shape each half into 2 loaves by using the bench scrapers to manipulate the sides.
- Lay baking paper over a large baking sheet and liberally dust it with flour. Using both bench scrapers, slide them under both ends of the dough and transfer the dough to the tray. Fold the paper up in the middle to separate and support the loaf. Repeat with the remaining loaf.
- Cover the dough with a lint-free cloth and let it rest for 20 minutes. (The dough will rise slightly and should resemble a puffy marshmallow. It will be loose and full of gas. Once you place the dough into the hot oven, it will quickly puff up.)
- Meanwhile, adjust the oven rack to the lowest position. Place a large inverted baking sheet on the rack and preheat the oven to 230C.
- Dust off any excess flour and spray the loaves lightly with water
- Transfer the baking paper onto the heated baking stone or tray.
- Bake, spraying the loaves with water twice more during the first 5 minutes of baking time, until the crust is a deep golden brown, about 22-27 minutes. The internal temperature of the bread should be 96C-100C.
- Transfer to an oven rack to cool completely before slicing and serving.
